Here are the projects we made at our 3D Project/Big Shot Class last Wednesday!!
They were so much fun!! I can't wait to give these items as Holiday gifts this year!!!
This first project is a Holiday pin - it can be worn on your winter coat, pinned to a purse, bag or scarf or even worn in your hair!! I just love making these pins!!
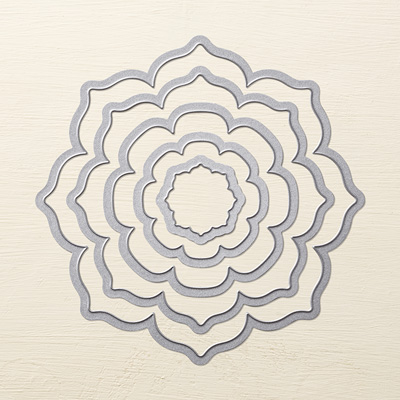
For this pin, we used the Floral Frames Framelit Dies with the Big Shot. We made three layers of each size flower - we used the three middle flowers for this project. Then we laid all nine flowers out on a piece of paper, sprayed them heavily with Spray Starch, then crumpled them all up inside the paper. We kept them crumpled up for a bit to dry, then we carefully unfolded each flower - but not too much!! Those wrinkles are what give the pin their texture!! After the flowers were dry, we put the pin together - each layer is held together with hot glue. We added a stick pin and hair clip to the back with hot glue as well. Finally, we added a fun, bright button tied with some baker's twine to the top of the flower. How fun is that!!

Floral Frames Framelits Dies 127012 $26.95

Candlelight Christmas Designer Fabric 126905 $9.95
This next project is one that our Stampin' Up co-founder and CEO, Shelli Gardner, demonstrated for us at the Lansing Regional in November! Of course, I just had to try it when I got home!!
I'm so glad I did!! It looks complicated but really is not!!
The "mug" in this case is made from the Fancy Favor Bigz XL Die with the Big Shot. We cut off the scallops on the top to give it a more "clean" look. Then we made the handle by punching a 1 3/4" circle, then a 2 1/2" circle and inserting the ring in the side of the mug. As a note.... It's a lot easier to put the handle on the mug before you put the mug itself together - bet you can guess how I know that!! The mug is made from Shimmery White paper - you really can't see from the picture, but the mug kind of "shines"!! - so cool!!
We put a couple of strips of the Festival of Prints Designer Series Paper stack around the mug, embossed the Cherry Cobbler mug and Early Espresso "steam" (with Cherry Cobbler and Early Espresso embossing powders) and added them to the mug!!
Next, we filled cello bags with hot cocoa (the front bag) and marshmallows (the bag behind it) and topped them with more DSP from the Festival of Prints Designer Series Paper stack. These toppers were made using the Window Frames Collection Framelit Dies and the Big Shot. We also embossed the snowflake from the mug in Early Espresso and punched it out with the 1" circle punch (and put these on the front bag topper) and stamped "Greetings of the Season" from the Greetings of the Season stamp set (and put it on the other bag topper).
Finally, we tied some Cherry Cobbler Sweater Trim around a candy cane!!
And you have... the perfect holiday gift!!

Fancy Favor Bigz XL Die 115965 $39.95

Festival of Prints DSP Stack 126904 $6.95

Window Frames Collection Framelit Dies 129021 $26.95

Cherry Cobbler 1/4" Sweater Trim 129938 $8.95
I hope you enjoyed these projects as much as I did!!
Hope to see you soon!
~amy


No comments:
Post a Comment