Wednesday, August 30, 2017

Delightful Daisy Scrapbook Pages


Before I get started on my post today, I have to take a moment to wish my daughter, Lilly, a happy 13th birthday!!  The teenage years are upon us!!  She's been a super-sweet kid so far (with some "other" moments sprinkled in....), but I'm sure hoping she keeps it mostly super-sweet these next few years (wish me luck!!).

This is Lilly and I on the beach in Glen Arbor, MI earlier this summer
(and, yes, she's already taller than me!!).


Happy Birthday, Lilly :)

I love you so much and am grateful every day that I get to call you my daughter!


Ok, enough sappiness... now on to our pages.... :)


We start our first page with a Whisper White base, then added a piece of Wisteria Wonder card stock to our page.  I just love doing this, especially with our limited number of colors of 12x12 card stock in the current Annual Catalog (it's the perfect work-around for this "problem")!

Then, we added a strip of the Delightful Daisy Designer Series Paper to the bottom of our page.
Delightful Daisy Designer Series Paper  144137


Next, we stamped our daisies in Peekaboo Peach ink (on Peekaboo Peach card stock) using the Daisy Delight Stamp Set and punched them out with the Daisy Punch.

You can purchase the Daisy Delight Stamp Set and punch separately, or save 10% when you buy them in the bundle!

We also added a Daffodil Delight 1/2" Circle to the center of our daisies, as well as a Clear Faceted Gem (these gems are beautiful!!).


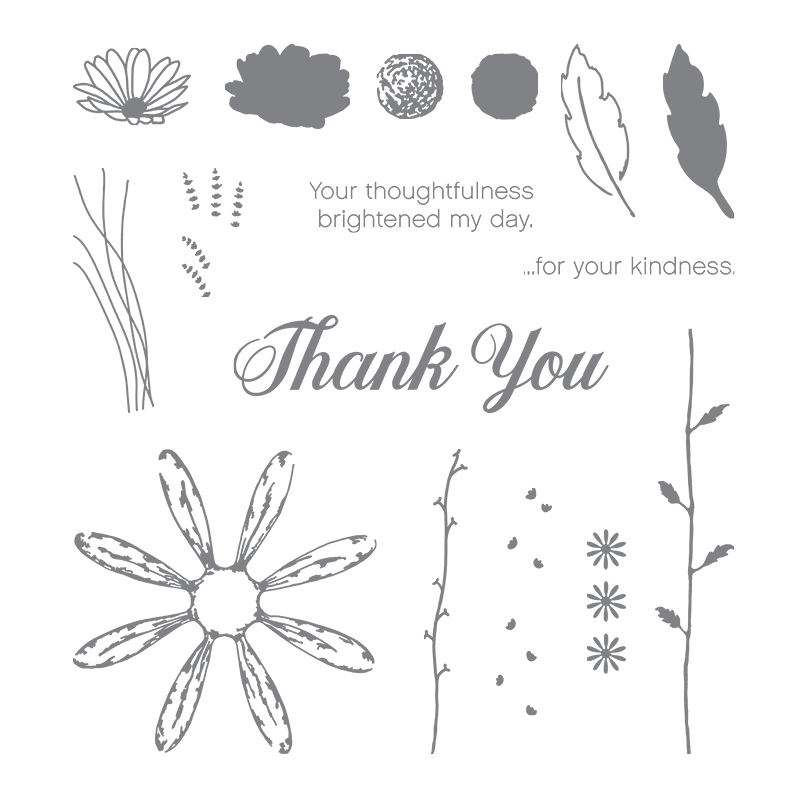
Daisy Delight Stamp Set  143669
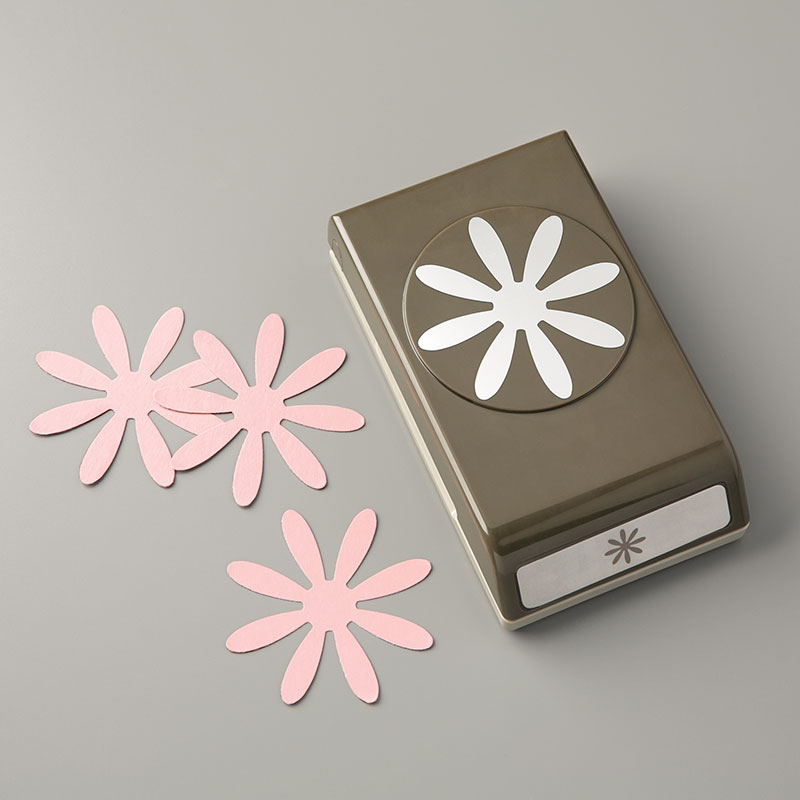


Daisy Punch  143713


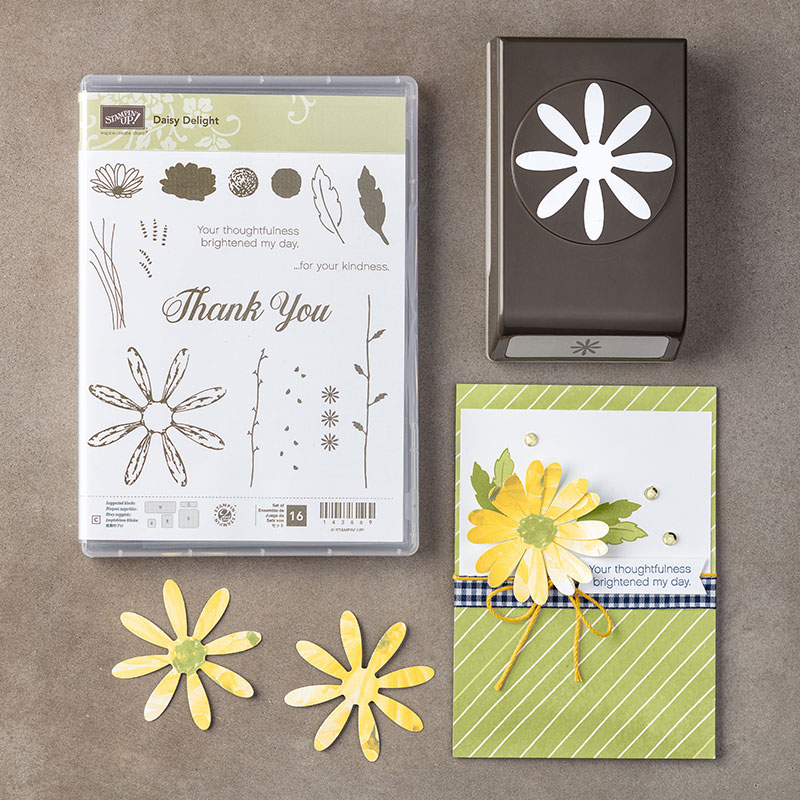
Daisy Delight Bundle  145361


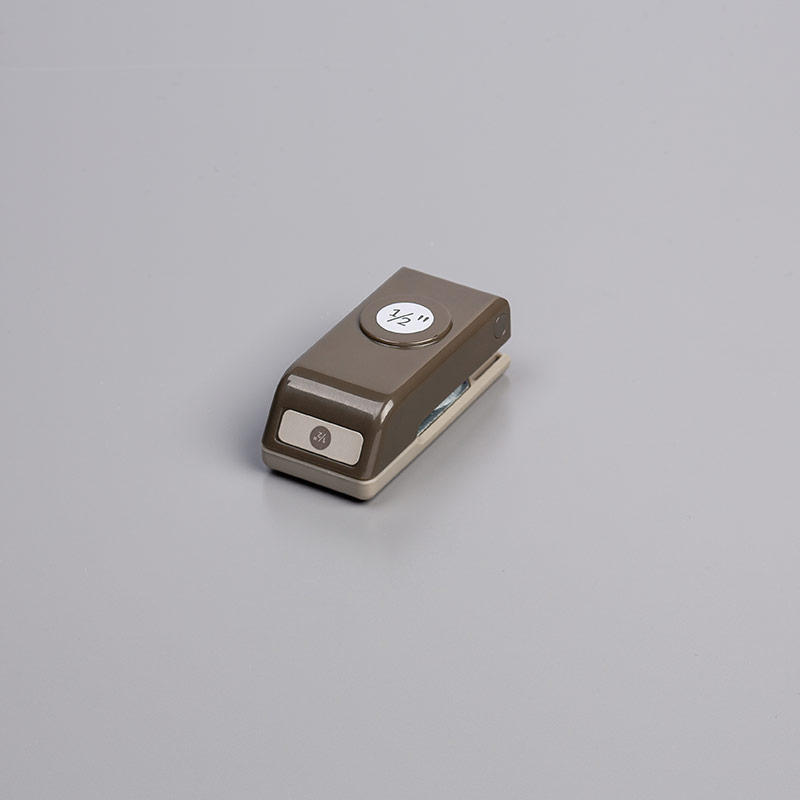
1/2" Circle Punch  119869


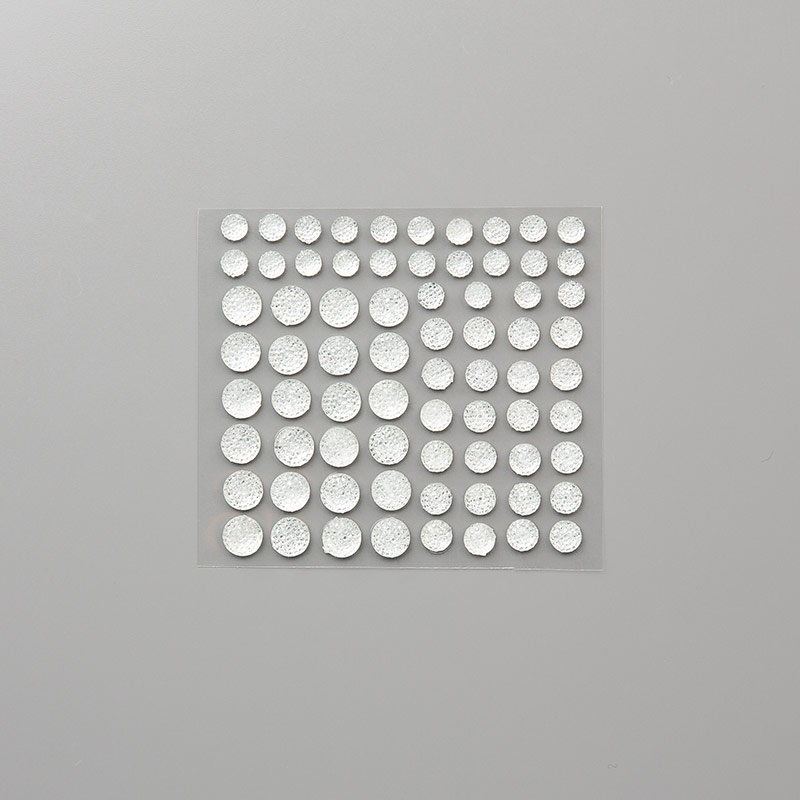
Clear Faceted Gems  144142


Here's a peak at our 2nd page....


It has a similar layout with the Whisper White base page, another piece of Wisteria Wonder card stock (placed vertically on the page this time) and a strip of Delightful Daisy Designer Series Paper (DSP) along the side of the page.


This time though...

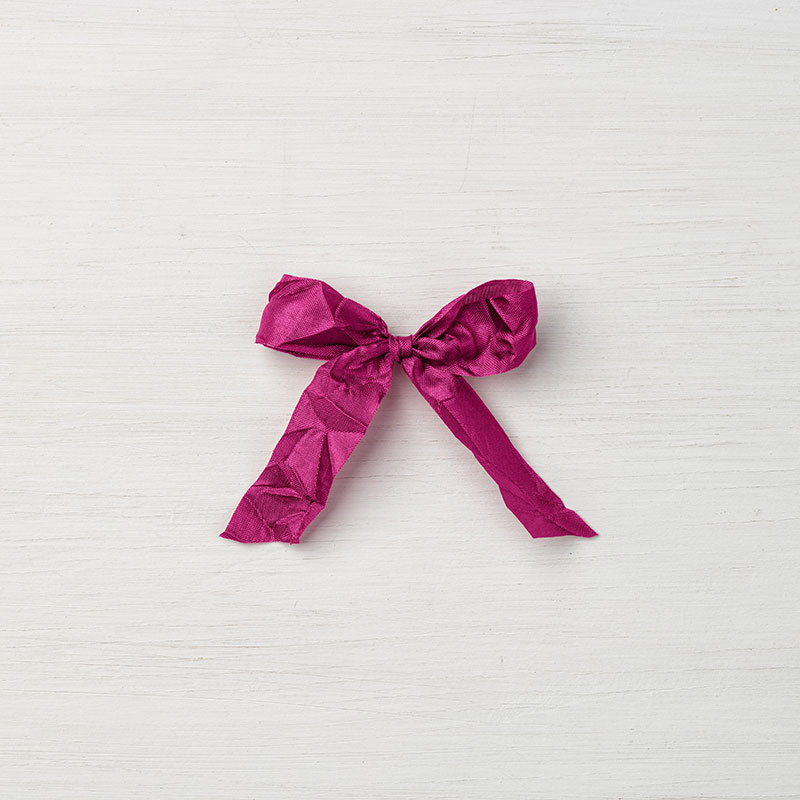
We tied a gorgeous Peekaboo Peach Crinkled Seam Binding bow around our strip of DSP.

We also punched 2 daisies using Daffodil Delight card stock and our Daisy Punch.  And... we added an Old Olive 1/2" Circle to the center of our daisy, as well as a Gold Faceted Gem.


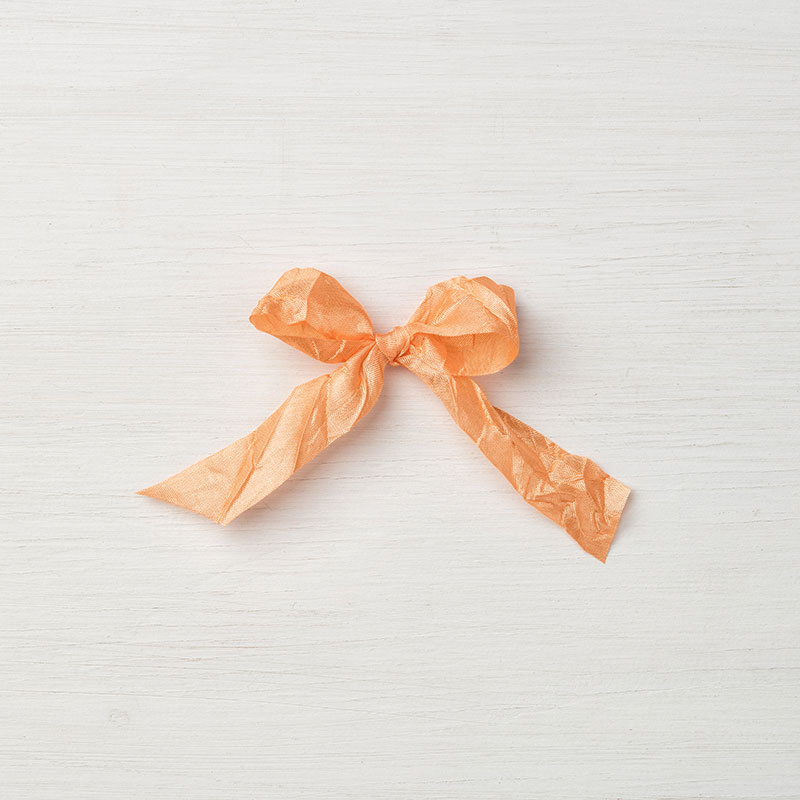
Peekaboo Peach Crinkled Seam Binding Ribbon  144192


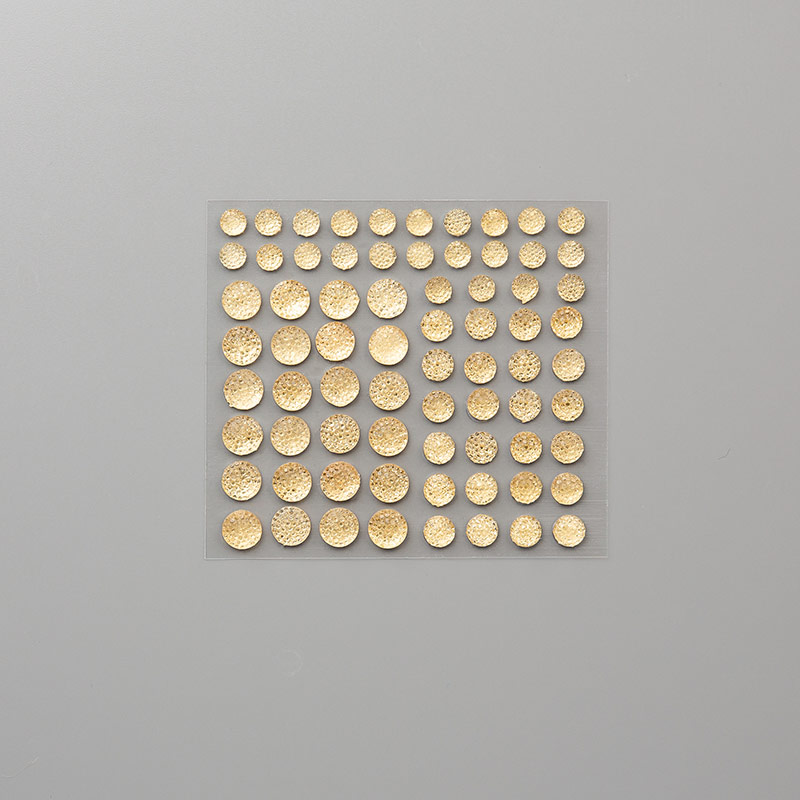
Gold Faceted Gems  144141


Finally, we stamped those cute, little flowers (also found in the Daisy Delight Stamp Set) in Calypso Coral, Wisteria Wonder, Daffodil Delight, Pear Pizzaz and Old Olive ink along the bottom of our page.

We also added an Old Olive border to the bottom of the page using the Decorative Ribbon Border Punch.


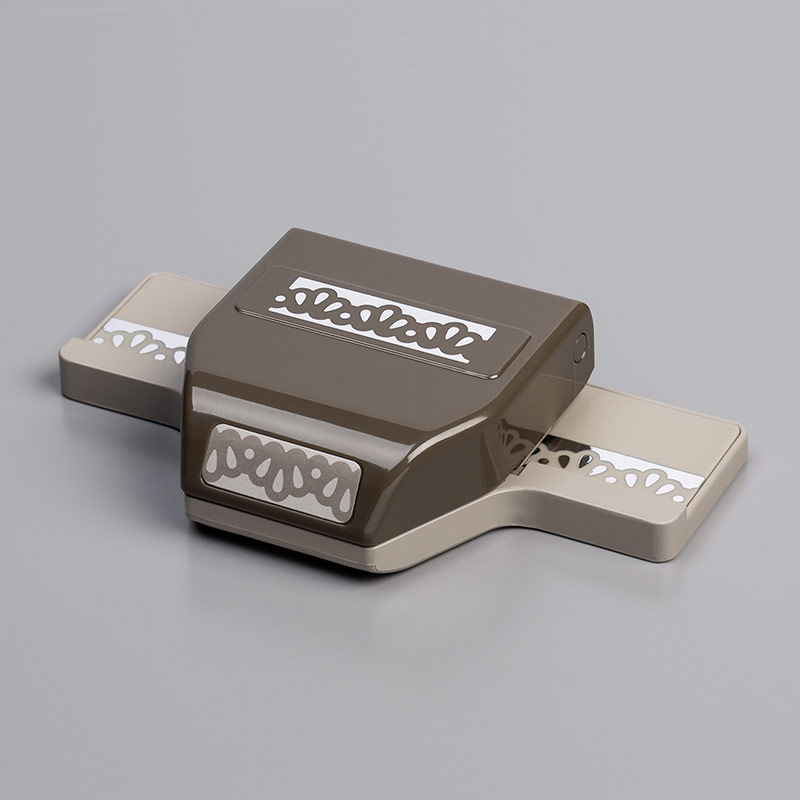
Decorative Ribbon Border Punch  143721


If you'd like to make fun scrapbook pages like this with us, 

consider attending the next Scrapbook Class 

at the Gathering Inkspiration Stamp Studio.


This class meets the last Tuesday of every month anytime from 4-9pm.  We make three 12x12 page layouts for $15, or the class is FREE with an order!

Our next class is on Tuesday, September 26.

Just RSVP to me at amy.frillici@yahoo.com to sign up today!!


AND.....

if  you're looking for more scrapbook page layouts, 


check out our Gathering Inkspiration Stamp Studio Group Facebook Page here.  Once you're on the page, just go to Photos, Albums, then find the Scrapbook Pages Album.  I hope you enjoy!!


I hope you were Inkspired today!!


Sunday, August 27, 2017

This Little Piggy


You make me happy, little piggy!!!

That's what you're going to say when you play with this stamp set!!

These images and sentiments in the This Little Piggy Stamp Set are just so cute!!


I had so much fun making this video, too...

Check it out here and learn just how to make this card :).


direct link:  https://www.youtube.com/watch?v=ymTFK9YLXxo


Did you know?????

If you become a subscriber to my Youtube channel, you'll never miss out 

on a thing (I promise)!!


So, what did you think of this card??  Do these little piggies make you as happy as they do me??  Leave a comment below and let me know!


Here are all the supplies used to make this card....

click to order here!!


Make sure to use Host Code: KAJGDKXA when you order!


https://www.stampinup.com/ecweb/ProductDetails.aspx?productID=143922&dbwsdemoid=2035972
This Little Piggy Stamp Set  143919/143922


https://www.stampinup.com/ecweb/ProductDetails.aspx?productID=144232&dbwsdemoid=2035972
Night of Navy Gingham Ribbon  144232


 https://www.stampinup.com/ecweb/ProductDetails.aspx?productID=144219&dbwsdemoid=2035972
Pearl Basic Jewels  144219


 https://www.stampinup.com/ecweb/ProductDetails.aspx?productID=143708&dbwsdemoid=2035972
Pinewood Planks Embossing Folder  143708


https://www.stampinup.com/ecweb/ProductDetails.aspx?productID=141709&dbwsdemoid=2035972
Watercolor Pencils  141709


 https://www.stampinup.com/ecweb/ProductDetails.aspx?productID=103954&dbwsdemoid=2035972
Aqua Painters  103954


 https://www.stampinup.com/ecweb/ProductDetails.aspx?productID=102845&dbwsdemoid=2035972
Blender Pens  102845


https://www.stampinup.com/ecweb/ProductDetails.aspx?productID=140931&dbwsdemoid=2035972
Basic Black Archival Ink Pad  140931


Make sure to......

 Use Host Code:  KAJGDKXA 
when you order online!


I send a handmade card to all of my customers!!

Order over $50, and I'll include a special surprise with your handmade card!!


If you like to make fun cards like this, you should consider the next.......

simple, beautiful card class.....


at the Gathering Inkspiration Stamp Studio (209 E Superior St in Alma, MI) on Wednesday, September 13 anytime from 4-9pm  Sorry, no Friday class in September.  We make 4 cards for $15 or the class is FREE with an order!

And…  mark your calendars going forward…. This class meets the 2nd Wednesday of every month anytime from 4-9pm and the following Friday from 1-3pm.  So, if September doesn’t work for you, maybe another month will! 

Just RSVP to me at amy.frillici@yahoo.com for the next class or to answer any questions you might have.


I hope you have an Inspired day!

Thursday, August 24, 2017

Coffee Cafe & Coffee Break


I need coffee!!  And I don't even drink it!!  This week has been crazy preparing for my Annual Customer Appreciation Event down at the stamp studio (later today)!!  Time always gets away from me!  I feel like I have lots of time to get everything accomplished and then, next thing you know, it's 2am and I'm just going to bed!!

Well, it will be totally worth it!!  I can't wait to spoil all of my local customers with free make-n-takes, a super cute treat made especially for them, lots of snacks, a fun raffle and a BOGO sale!!

I'll be sure to post pics of the event next week.  We're heading out of town for a few days this weekend for a last hurrah before it's back to school time! (and then I should be back on track!).  Summer is always so much fun, but it sure is tiring!!

Ok, so back to our card and the need for coffee....


We start our card with a Crumb Cake card base, then added a layer of Early Espresso card stock, followed by a layer of Whisper White card stock.

Next, we added 2 strips of the Coffee Break Designer Series Paper (DSP) to the bottom of our card.  I think the tones of this DSP are perfect for masculine cards, too (something I always need more of!).  I can't wait to create more projects with this DSP!


https://www.stampinup.com/ecweb/ProductDetails.aspx?productID=144155&dbwsdemoid=2035972
Coffee Break Designer Series Paper  144155


Before adding our Whisper White layer to our card, we put a strip of Crumb Cake Classic Weave Ribbon around the Whisper White layer and tacked it on the back.  Then, we tied a bow around this strip with a separate piece of ribbon.  This ribbon has such a classic look, hence the name!


Crumb Cake Classic Weave Ribbon  144162


Now the fun really begins....

We die-cut our coffee cup (in Crumb Cake card stock), the sleeve around it (in Whisper White card stock) and the clear top (using our Window Sheets) with the new Coffee Cup Framelits.  We also stamped "Thanks a Latte" (in Garden Green ink) and our coffee beans (in Early Espresso ink) using the Coffee Cafe Stamp Set.  These pieces were also die-cut with the Coffee Cup Framelits.  This stamp set and framelits are so much fun to play with - just look at those cute coffee beans :).

You can purchase this stamp set and framelits separately, or save 10% when you buy them in the bundle (and why wouldn't you want to do that??).


https://www.stampinup.com/ecweb/ProductDetails.aspx?productID=143677&dbwsdemoid=2035972
Coffee Cafe Stamp Set  143677


https://www.stampinup.com/ecweb/ProductDetails.aspx?productID=143745&dbwsdemoid=2035972
Coffee Cup Framelits  143745


https://www.stampinup.com/ecweb/ProductDetails.aspx?productID=145331&dbwsdemoid2035972
Coffee Cafe Bundle  145331


https://www.stampinup.com/ecweb/ProductDetails.aspx?productID=142314&dbwsdemoid=2035972
Window Sheets  142314


Before adding our coffee cup to our card, we stamped the straw (in Garden Green ink) and the "whip" (in Smoky Slate ink) directly onto our Whisper White layer.  Just place the coffee cup about where you'd like it, then do your stamping - this should help you get things lined up nicely!

I hope you enjoyed this card!

Thanks so much to Jessica Hill for her inspiration on this card!


And...  it's your last chance to order my latest TO GO kit class!!

 Make these 4 awesome birthday cards in the comfort of your own home anytime you'd like!


Check out all of the details on this great TO GO kit class here!!

Please RSVP and prepay by Friday, August 25.


I hope have an Inkspired day!

Sunday, August 20, 2017

Stampin' Up! Graceful Garden


This is such a gorgeous rose, don't you think??  I knew as soon as I saw this stamp set, Graceful Garden, in the Annual Catalog that it was a must-have!

Read on to learn all about this card and gorgeous stamp set :).


We start our card with a Powder Pink card base.  Next, we added a layer of Berry Burst card stock embossed with the Garden Trellis Embossing Folder.  I love how the trellis embossing just peaks out from behind the stamped flower image!


Garden Trellis Embossing Folder  143741


Then, we stamped our rose (from the Graceful Garden Stamp Set) in Berry Burst ink on the flower and Old Olive on the leaves and stem - I like to use my Stampin' Write markers when I want two colors of ink on one stamp.  They work great for this technique - just make sure to use the fat, brush tip end of your marker kind of on an angle when coloring your stamp.


Graceful Garden Stamp Set  143846/143849


2017-19 In Color Stampin' Write Markers  144033


Brights Stampin' Write Markers  131259


We also stamped that trellis-looking image (also from the Graceful Garden Stamp Set) in Crumb Cake ink around the corners of our Whisper White piece.

Next, we colored in our rose with our Powder Pink marker and added a Berry Burst Crinkled Seam Binding Bow to the flower.


Berry Burst Crinkled Seam Binding Ribbon  144191


Finally, we stamped "Thinking of You' from the Thoughts and Prayers Stamp set on the inside of our card.


This is the perfect stamp set to have on hand for those sympathy, get well, thinking of you and praying for you cards - it has just the right thing to say when you're at a loss for what to say!


Thoughts and Prayers Stamp Set  127851/127805


I hope you enjoyed this card!


Thanks so much to BJ Peters for her inspiration on this card!


If you like to make fun cards like this, you should consider the next.......


simple, beautiful card class.....


at the Gathering Inkspiration Stamp Studio (209 E Superior St in Alma, MI) on Wednesday, September 13 anytime from 4-9pm  Sorry, no Friday class in September.  We make 4 cards for $15 or the class is FREE with an order!


And…  mark your calendars going forward…. This class meets the 2nd Wednesday of every month anytime from 4-9pm and the following Friday from 1-3pm.  So, if September doesn’t work for you, maybe another month will! 

Just RSVP to me at amy.frillici@yahoo.com for the next class or to answer any questions you might have.

And...

make sure to use host code  KAJGDKXA

when you order online!!

I send a hand-made card to all my customers!!!

Order over $50 online, and I'll include a special surprise with your handmade card!!


OOOOOHHHH, there's one more thing...


Want a little holiday inspiration??  

Check out this great bundle that you can pre-order in August (before the Holiday catalog even goes live on September 1!).


direct link:  https://www.youtube.com/watch?v=GeeiGC5bApI


I hope you have an Inkspired day!!