
I need coffee!! And I don't even drink it!! This week has been crazy preparing for my Annual Customer Appreciation Event down at the stamp studio (later today)!! Time always gets away from me! I feel like I have lots of time to get everything accomplished and then, next thing you know, it's 2am and I'm just going to bed!!
Well, it will be totally worth it!! I can't wait to spoil all of my local customers with free make-n-takes, a super cute treat made especially for them, lots of snacks, a fun raffle and a BOGO sale!!
I'll be sure to post pics of the event next week. We're heading out of town for a few days this weekend for a last hurrah before it's back to school time! (and then I should be back on track!). Summer is always so much fun, but it sure is tiring!!
Ok, so back to our card and the need for coffee....

We start our card with a Crumb Cake card base, then added a layer of Early Espresso card stock, followed by a layer of Whisper White card stock.
Next, we added 2 strips of the Coffee Break Designer Series Paper (DSP) to the bottom of our card. I think the tones of this DSP are perfect for masculine cards, too (something I always need more of!). I can't wait to create more projects with this DSP!
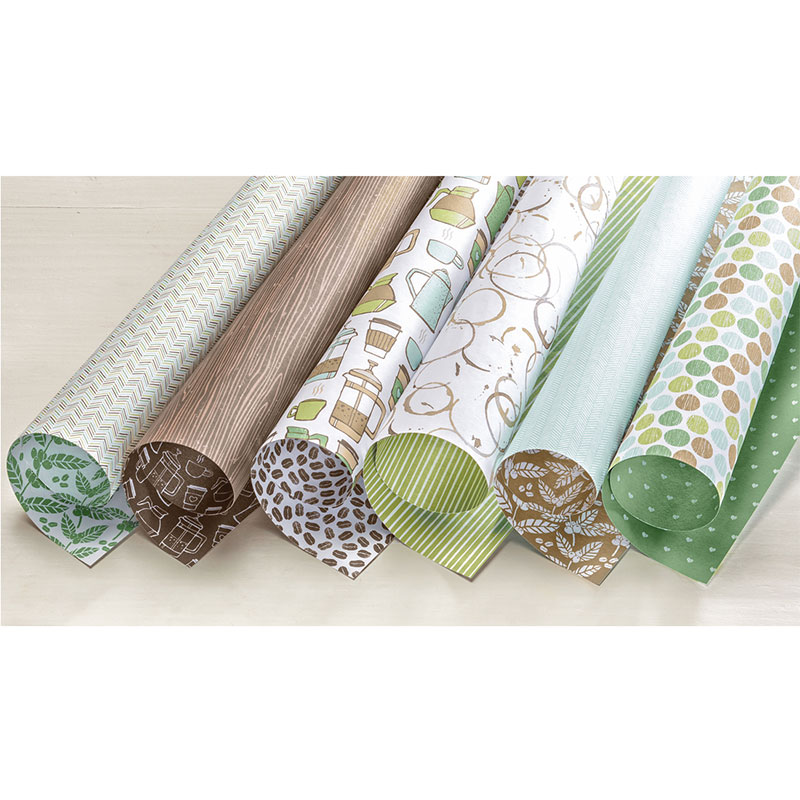
Coffee Break Designer Series Paper 144155

Before adding our Whisper White layer to our card, we put a strip of Crumb Cake Classic Weave Ribbon around the Whisper White layer and tacked it on the back. Then, we tied a bow around this strip with a separate piece of ribbon. This ribbon has such a classic look, hence the name!
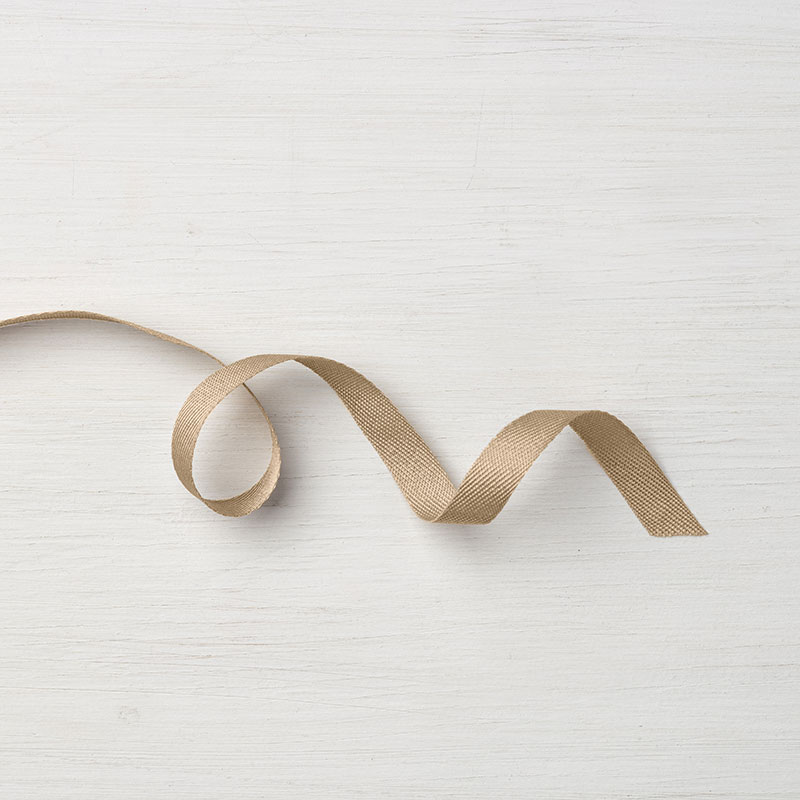
Crumb Cake Classic Weave Ribbon 144162

Now the fun really begins....
We die-cut our coffee cup (in Crumb Cake card stock), the sleeve around it (in Whisper White card stock) and the clear top (using our Window Sheets) with the new Coffee Cup Framelits. We also stamped "Thanks a Latte" (in Garden Green ink) and our coffee beans (in Early Espresso ink) using the Coffee Cafe Stamp Set. These pieces were also die-cut with the Coffee Cup Framelits. This stamp set and framelits are so much fun to play with - just look at those cute coffee beans :).
You can purchase this stamp set and framelits separately, or save 10% when you buy them in the bundle (and why wouldn't you want to do that??).
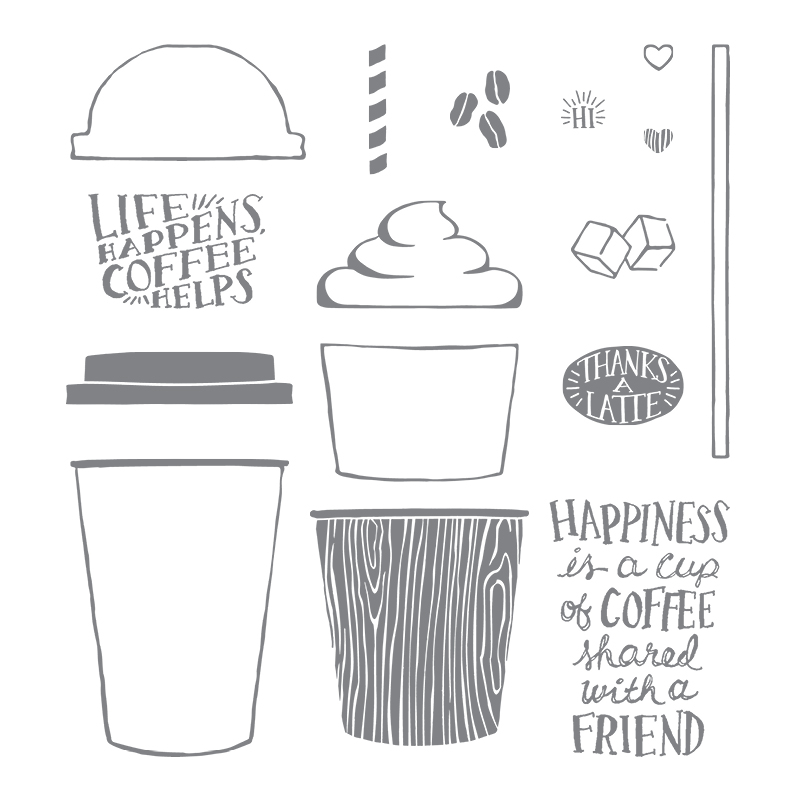
Coffee Cafe Stamp Set 143677
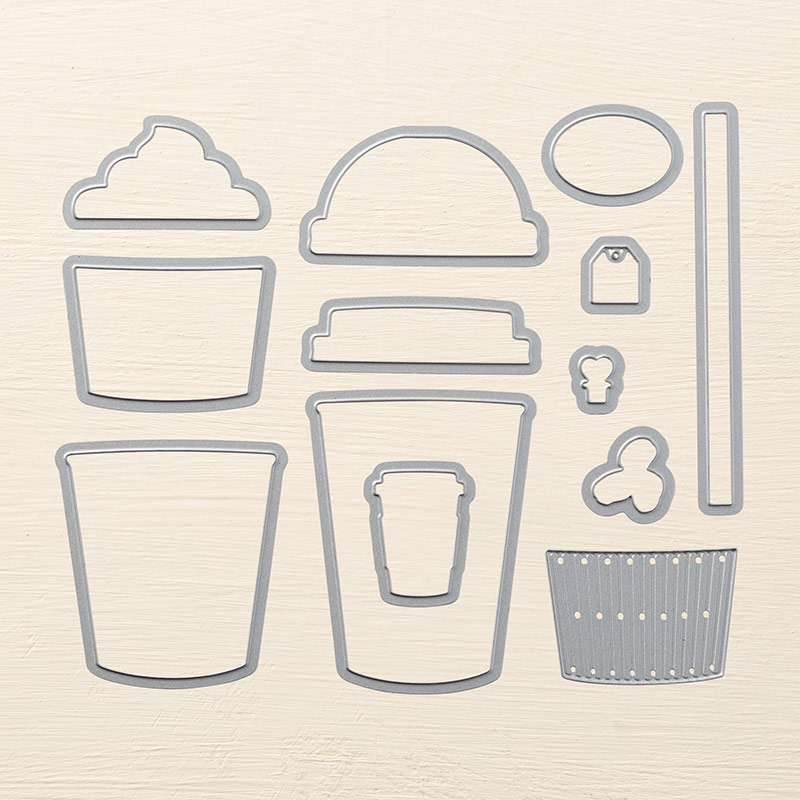
Coffee Cup Framelits 143745
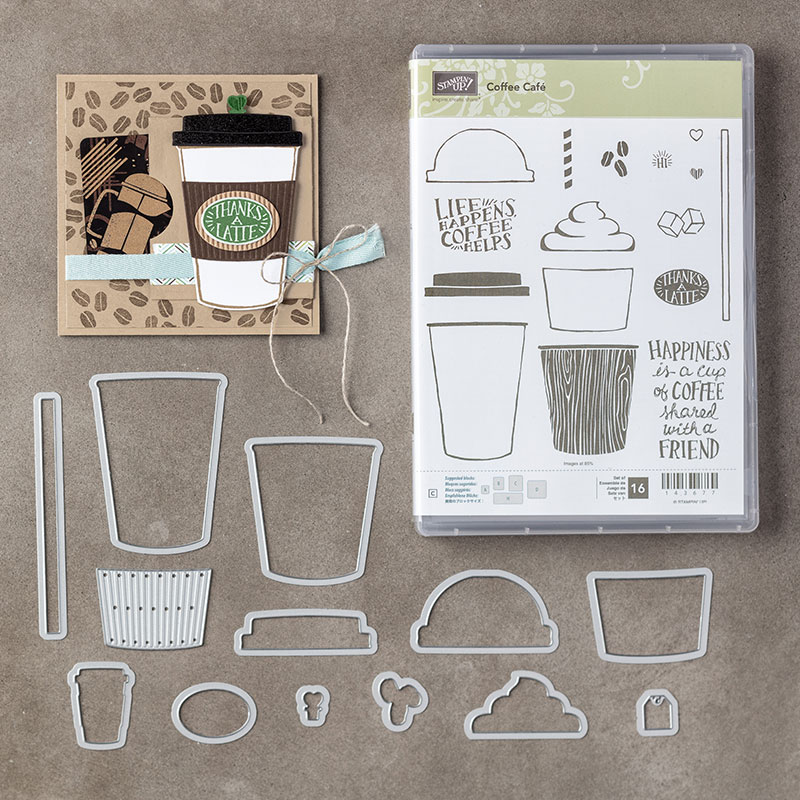
Coffee Cafe Bundle 145331
Window Sheets 142314

Before adding our coffee cup to our card, we stamped the straw (in Garden Green ink) and the "whip" (in Smoky Slate ink) directly onto our Whisper White layer. Just place the coffee cup about where you'd like it, then do your stamping - this should help you get things lined up nicely!
I hope you enjoyed this card!
Thanks so much to Jessica Hill for her inspiration on this card!

And... it's your last chance to order my latest TO GO kit class!!
Make these 4 awesome birthday cards in the comfort of your own home anytime you'd like!

Check out all of the details on this great TO GO kit class here!!
Please RSVP and prepay by Friday, August 25.
I hope have an Inkspired day!

No comments:
Post a Comment